With winter right around the corner, it is time to get serious about cleaning up the garden and putting it to bed before the rains start in earnest.
Remove any dead plants from the garden and compost them if they are not diseased.
At the same time, pull any weeds no matter how small. After you’ve cleaned up the garden, apply mulch.
Use straw, hay, chopped leaves or any fluffy type of material as they are better garden insulators than denser mulches such as wood chips.
Last of all, don’t forget to turn off and drain your irrigation system before the first hard freeze.
Care for your ornamental garden
• Annuals – Pull up annuals as needed; compost if no disease is present. Continue to deadhead plants that are blooming.
Plant pansies, violas, ornamental kale, cabbage and chard by mid-month.
Scatter seeds of forget-me-nots, calendula, poppies, larkspur and annual alyssum for early spring bloom. Empty hanging baskets and wash.
• Bulbs, Corms, Rhizomes and Tubers – Beginning mid-month, plant spring-flowering bulbs. When night temperatures drop into the 40s, dig up and dry tubers of cannas, elephant ears and tuberous begonias and store them in sawdust, peat or newspaper in a cool dark place.
Dahlia tubers and gladiolus corms can be left in the ground or dug up after the first hard frost.
If you leave dahlias in the ground, cut down the foliage and cover each with a plastic nursery pot and mulch with at least 6 inches of material such as straw or leaves.
Cut the dead leaves from gladiolus and cover with at least 4 inches of mulch.
To be safe or if you live in higher elevations, you may wish to dig up dahlias and gladiolus and store them in sawdust in a cool dark place.
• Lawns – Plant grass seed or overseed until mid-month.
Rake leaves off grass. Chop them up to use as mulch or compost them.
• Perennials – Rake and discard leaves and other debris from under roses.
Protect roses from cold by piling 6 inches of mulch over the bud union.
Save non-hardy fuchsias and geraniums by cutting plants back to 6 inches and storing them in a cool, dark, protected place until spring; water them lightly once a month.
Divide and plant new perennials by mid-month.
• Shrubs and trees – Plant new purchases now. Transplant deciduous trees and shrubs after their leaves have fallen. Add mulch around new plantings to retain moisture and to provide nutrients as the mulch decomposes.
Water existing plantings as needed; do not fertilize or prune them.
Leave small leaves where they fall and shred large ones to make leaf mulch for your garden beds.
Care for your edible garden:
• Berries – Remove debris around all berry plants. Apply layer of mulch after first hard frost for winter protection.
• Fruit trees – Harvest apples when seeds turn brown and pears when full-sized but hard. Clean up fallen fruit, leaves and other debris under trees.
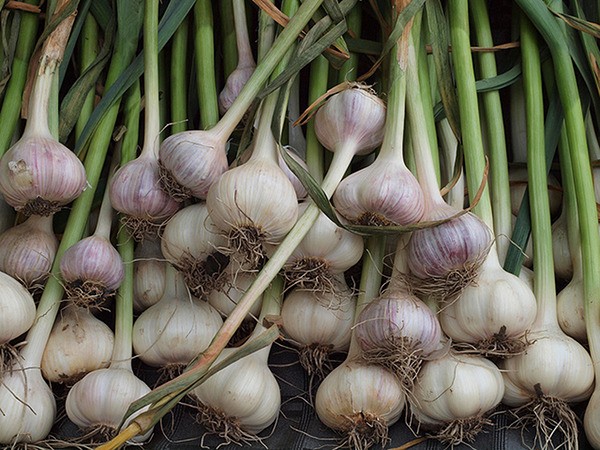
• Vegetables – Sow fava broad beans now for harvest in the early spring. By month-end, plant garlic (see sidebar), multiplier onions and shallots. Mulch beds that won’t hold winter or cover crops. Mulch fall and winter vegetables for frost protection. Mid-month pinch off the growing tips of Brussels sprout plants to encourage maturation of the remaining sprouts.
How to plant garlic
1. Plant garlic about a month before the ground freezes. Aim for mid-October and try to get them planted by the end of October.
2. Do not use garlic purchased at the grocery store as it may have been treated to retard sprouting. Use garlic that is specifically intended for planting. Acquire it from a friend, nursery or plant sale the first year. The next year you can save some bulbs for planting from your own crop.
3. Garlic bulbs consist of cloves. Each clove can be planted to produce a new bulb. Break the bulb apart to separate the cloves. Select larger cloves to plant as they produce the biggest bulbs.
4. Choose a sunny location in your garden with fertile, well-drained soil to plant your garlic. A raised bed is ideal. Mix a layer of compost or aged manure into your soil. Mix in potassium and phosphorus fertilizers if needed. A packaged fertilizer mix specifically for bulbs is easiest to use.
5. Plant the garlic 2 inches deep with the pointy end up and 6 inches apart in the row. If your soil is very fertile, rows can be 6 inches apart. Otherwise, space the rows 12 inches apart. A dibble makes the job go faster. Poke the holes, then drop in garlic cloves.
6. After planting, rake over the area to fill in all the holes. Then spread about 6 inches of mulch (straw, chopped leaves, hay) over the bed.
7. Shoots will appear above the mulch as early as January and the crop usually will be ready to harvest by mid-July.
Lois Bellamy and Bill Wrobel are Washington State University-certified, Clallam County Master Gardeners.


